947 private links

Laissez-moi deviner : vous êtes du genre à vous vanter d'être un administrateur système compétent, mais vous ne vous souvenez pas de la dernière fois que vous avez tapé
apt update && apt upgradesur vos serveurs en production ? Pas étonnant que vos systèmes ressemblent à un gruyère numérique avec plus de trous que de fromage. Un bon sysadmin met à jour ses systèmes - un vrai sysadmin automatise ça et passe à autre chose.Heureusement, les créateurs de Debian n'ont pas supposé que vous étiez tous des héros de la ligne de commande avec une mémoire infaillible et un agenda aussi vide que
/dev/null. Ils nous ont gratifiés d'unattended-upgrades, ce petit bijou d'automatisation que seuls les vrais barbus savent configurer correctement. Bien sûr, vous pourriez continuer à mettre à jour manuellement, de la même manière que vous pourriez continuer à croire que vi est plus difficile qu'Emacs.


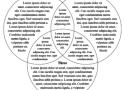
A few years ago I made a Venn diagram using floats and absolute positioning. It was fine. Nothing to really brag about, but it got the point across.
I had use for CSS shapes in a project and wanted to play around beyond what the project itself allowed. I decided to revisit my Venn diagram and create something a bit more modern and flexible. This also gave me a chance to play with CSS grid overlaps, which I had not done yet simply because I had no reason.
This post is just a summation of what I made with some stuff I learned. To start, take a look at the base model of my CSS Grid and Shape-Outside Venn Diagram, also embedded immediately below.

One of my all-time favourite CSS tricks is using backdrop-filter: blur() to create a frosted glass effect. I use it in just about every project I work on, including this blog!
Here’s a quick demo, to show what I’m talking about:
This is an example website showing how I typically use backdrop-filter to create glassy headers.
Notice that as the cupcake moves behind the header, it appears blurry, as it would if it was passing behind frosted glass.
This effect helps us add depth and realism to our projects. It’s lovely.
But when I see this effect in the wild, it’s almost always missing some crucial optimizations. A couple of small changes can make our frosted glass so much more lush and realistic!
In this post, you’ll learn how to make the slickest frosted glass ever ✨. We’ll also learn quite a bit about CSS filters along the way!
Salut les agrumes !
Vous êtes curieux ou passionné par les réseaux informatiques ? Vous êtes étudiant et avez du mal à appréhender et comprendre cet univers ? Vous êtes tombé au bon endroit ! Nous vous souhaitons la bienvenue dans ce tutoriel. Entrons tout de suite dans le vif du sujet. Avez-vous déjà entendu une discussion d’administrateurs réseau ? Vous avez probablement entendu des termes compliqués, qui vous semblent insignifiants comme réseau privé virtuel, protocole, niveau applicatif, UDP, transmission de paquets… Et alors quand ils parlent de leurs problèmes de configuration de routeurs, de passerelles, de serveurs DNS, vous vous dites qu’ils viennent d’une autre planète ! Rassurez-vous, ce tutoriel est là pour vous expliquer comment tout cela fonctionne.
Pour commencer, vous appréhenderez les bases du réseau informatique. Puis vous découvrirez la notion fondamentale de protocole. Ensuite, vous verrez comment on s’y repère sur un réseau avec l’adressage. Une fois ces bonnes bases acquises, vous pourrez vous focaliser sur les mécanismes avancés de la communication. L’aspect physique des transmissions vous sera aussi présenté. Finalement, vous vous rendrez compte avec les services à quel point tout est fait pour que l’utilisation des réseaux soit facilitée.
En fin de tutoriel, vous trouverez quelques notions de sécurité réseau ainsi que des sujets annexes. Ces derniers sont des concepts moins techniques, voire assez généraux mais indispensables en réseau. Ces chapitres peuvent être feuilletés indépendamment du reste du cours.
La semaine dernière, un de mes clients – un musicien professionnel de la région – m’a amené son PC pour une mise à jour. La machine – un modeste Lenovo ThinkCentre avec un processeur Intel Core i3 – est équipée d’un système OpenSUSE Leap, et le client souhaite migrer vers une solution LTS basée sur Rocky Linux 9.
Lors de la sauvegarde initiale des données, je me suis retrouvé confronté à quelques dysfonctionnements bizarres. J’ai eu droit à des blocages inopinés avec
rsyncetscp. J’ai démarré une session de secours pour voir, mais le problème persistait. Un coup desmartctlme confirmait que le disque SSD était apparemment en train de me lâcher. Le problème, c’est que le client ne disposait que d’une sauvegarde incomplète de ses données.
- J’ai donc extrait le disque de la machine pour le remplacer par un disque neuf.
- J’ai installé un système Rocky Linux 9 minimal dessus.
- J’ai branché le SSD défectueux à un adaptateur USB et je l’ai relié au PC.
La mise à niveau est le processus qui permet de passer d'une version de Fedora Linux à sa version supérieure sans réinstaller. Cela ressemble en fait à une mise à jour importante du système.
Les avantages sont les suivants :
- Tous les paquets installés resteront présents et à jour ;
- Vos fichiers de configuration ou la personnalisation du système seront préservés (si les logiciels sont bien entendus compatibles d'une version à une autre) ;
- Les dépôts tiers bien configurés (comme le dépôt RPMFusion) sont correctement pris en charge ;
- Votre ordinateur sera disponible plus rapidement.
Nous allons vous montrer la manière de procéder. Notez qu'en cas d'échec de la mise à niveau, au redémarrage suivant vous reviendrez sur votre Fedora Linux actuelle comme si de rien n'était.
Cette procédure nécessite aussi un peu d'espace disque sur votre partition système, n'hésitez pas à faire un peu de nettoyage (dans les journaux, logiciels installés et autres caches) avant si nécessaire. Cet espace disque requis dépend de la taille des programmes installés (cela peut représenter plusieurs Gio).
Le mois dernier, je vous parlais de mon problème lié aux crawlers d’IA en bloquant l’accès à mon serveur à des pays entiers. Aujourd’hui, je vais vous montrer comment j’ai mis en place Anubis avec Traefik pour réussir à ne bloquer (que ?) les crawlers et les bots.

In this article, we are going to take a look at what CORS is, how you can configure CORS with Express, and how to customize the CORS middleware to your needs.
SysAdmin Stuff | Linux | Network | Security

Conditional rendering in React allows you to display different UI elements based on conditions. This is useful for handling authentication states, user permissions, loading states, and more.
Just like JavaScript provides if-else, ternary (? :), logical AND (&&), and switch-case, React also uses these methods for rendering components conditionally.
In this post, you’ll learn about all these techniques, their best use cases, and best practices.

Security is essential for a GNU/Linux VPS (virtual private server) because attackers actively search for vulnerable servers to exploit.
Imagine hosting a website or some other service hosted on a VPS, and an attacker guesses the default password or exploits a known vulnerability, installs malware, and now what? Your customers’ data might be in danger, and you risk damaging your reputation.
In this post, you will explore the ways to secure a GNU/Linux VPS to ensure that you and your customers are safe.

Text fragments allow linking directly to a specific portion of text in a web document, without requiring the author to annotate it with an ID, using particular syntax in the URL fragment. Supporting browsers are free to choose how to draw attention to the linked text, e.g. with a color highlight and/or scrolling to the content on the page. This is useful because it allows web content authors to deep-link to other content they don't control, without relying on the presence of IDs to make that possible. Building on top of that, it could be used to generate more effective content-sharing links for users to pass to one another.
Example:
https://git-scm.com/docs/git-reset#:~:text=The%20HEAD%40{1}%20is,any%20other%20valid%20commit%20reference.
(result)
Access 271+ ready-to-use components and code snippets for HTML, React, CSS, and Tailwind CSS. Save development time with these pre-built solutions.

In this blog we are going to learn the format of systemd timers and their onCalendar field. You can find what systemd timers are and why they are a better alternative to cron over here
Si tu es nouveau ou nouvelle sur Mastodon ou si tu souhaites faire découvrir ce réseau social autour de toi ,
voici quelques ressources qui pourraient être utiles:
 Présentation générale : c'est quoi Mastodon ?
https://tutox.fr/wp-content/uploads/conferences/mastodon_conference.html
Conseils pour utiliser mastodon:
https://fedi.tips/
Mastodon vs twitterX :
https://video.passageenseine.fr/w/iV5HFFbpXD8JoRdWnysq55
Créer un compte de secours :
https://tutox.fr/2023/09/23/deux-mammouths-valent-mieux-quun/
jQuery and its cousins are great, and by all means use them if it makes it easier to develop your application.
If you're developing a library on the other hand, please take a moment to consider if you actually need jQuery as a dependency. Maybe you can include a few lines of utility code, and forgo the requirement. If you're only targeting more modern browsers, you might not need anything more than what the browser ships with.
Part 3 of my in depth tutorial series on building a modern full-stack web app, using Java with Spring Boot, Javascript with Vue and NuxtJS, Docker, Heroku, Gitlab CI/CD. The goal of this part is that we want to prepare our web-apps for easy and modern deployment. We want to be able to quickly run our front- and backend on any machine and have the ability to scale the application if needed.
At this point we have a front- and backend that runs perfectly on our local machine. While this tutorial will make more sense if you completed the previous parts, it can also be helpful in general. The goal of this part is that we want to prepare our web-apps for easy and modern deployment. We want to be able to quickly run our front- and backend on any machine and have the ability to scale the application if needed. As with everything else there are plenty of ways to accomplish it. For this series we will work with Docker as it has gained incredible popularity over the past years. This tutorial is split into four subparts:
- What is Docker?
- Dockerizing the frontend
- Dockerizing the backend
- Running it all at once
Comme je l’ai expliqué ici et là, je veux cesser d’utiliser les services des Big Tech américains. Heureusement pour moi, je n’en ai jamais utilisé tant que ça.
Ceci étant dit, j’utilise un téléphone Android, et pas un Fairphone, ou un Murena, ou tout autre smartphone livré avec un système non propriétaire déjà installé (c’est-à-dire basé sur Android Open Source Project, mais sans les trucs de Google et de ses amis).
Ces systèmes d’exploitation sont préférables, car:
- Ils ne nous espionnent pas et n’envoient pas nos données à Google ou au fabricant de notre téléphone.
- Ils nous permettent de choisir les applications que l’on souhaite installer, sans en imposer aucune (on peut installer une application Google si on le souhaite, mais on n’y est pas obligé).
D’autre part, le smartphone “traditionnel” est livré avec une version d’Android pleine de ~fonctionnalités~ spywares Google, très souvent complétées par ~fonctionnalités~ spywares du fabricant du téléphone (des logiciels redondants ou inutiles dans 90% des cas). Et ces smartphones nous obligent quasiment à créer un compte Google ou à nous connecter à leur Play Store pendant la phase d’installation.

Dans le monde du développement logiciel, Git est devenu un outil incontournable pour la gestion de versions. Cependant, avec des dépôts de plus en plus volumineux, il peut devenir fastidieux de cloner l'intégralité d'un projet, surtout si vous n'avez besoin que d'une partie spécifique du code. C'est là qu'intervient la commande git sparse-checkout.
TL;DR
git clone --no-checkout <URL_du_dépôt>
cd <nom_du_dépôt>
git sparse-checkout init --conegit sparse-checkout set src/git sparse-checkout add bin/ templates/git sparse-checkout list
git sparse-checkoutest un outil puissant pour gérer efficacement les grands dépôts Git en réduisant la quantité de fichiers récupérés. Il permet d'améliorer les performances et de travailler plus efficacement en ne téléchargeant que ce qui est réellement nécessaire.
Hello, my name is Hugo and I've been blogging since 2003. Over the years, I've tested countless tools, platforms, and strategies to create and grow blogs.
Beyond blogging, I'm an entrepreneur who founded and scaled a startup to 700 employees across Europe. Throughout my journey, I've maintained my blog to share insights and lessons learned along the way.
I'm also the founder of BlogTally , a toolbox specifically designed for bloggers and content creators, and the creator of Bloggrify , an open-source static blog generator.